3.11.12

Mystique Costume Evolution

With Halloween being one of my favorite holidays of the year I opted for a challenging costume. Who better than Mystique from X-men? Afterall, she's creepy, hot, and an absolute badass.

Finally settling on a combination of Byran Singer's X-men film version and one of the comic book versions, I immediately began gathering the necessary pieces of my costume together by mid-September. I even commissioned a friend to sew the top for me!

For the various pieces I ordered the contacts from Clearly Contacts, while the rest of the make up, I purchased at the local costume shop. The scales pieces themselves were hand cut from dry blue acrylic paint and liquid latex. The piece itself took well over three hours to put together but well worth the effort.

 To see the results and a makeup tutorial, see below.


Mystique Costume Evolution!!


Make up list of must have and approximate timing.


A party of characters.


(Order of left to right)
Goth, Emma Frost, Wolverine, Mystique, Lucha Libre, Lady de Renaissance, and Clark Kent
Photo taken by Ira Malinich, the official photographer at the party my friends and I attended.
I'm assuming he was an official photographer anyway... he had big camera.

A Wolverine and a Mystique.


I searched high and low for a video that explained how to go about doing the make up. In my humble option this video was the best.


21.9.12

Don Quixote and His Giants

A commission piece for my friend, Catherine, who thoroughly enjoys reading.

The idea for this piece came up during a furious brainstorm several days after she commissioned me to do a piece for her. Without a strict sense of direction I stormed for any theme/idea that would be within Catherine's realm of interest. For some bizarre reason I finally landed on Don Quixote, a book I've never actually read but was kind of acquainted with thanks to an episode of a show called Wishbone.

For those of you who are curious Wishbone was a TV series broadcasted in the mid 1990's about a Jack Russell Terrier who iterates classic literature while imagining himself as the protagonist in each tale he tells. Educational plus you get to see a Jack Russell Terrier dressed up in cute little outfits, although I doubt the dog enjoyed it that much.

Moving on, the theme of this piece is about imagination, which is illustrated through Don Quixote's battle with the giants. In the book the "giants" are actually windmills. Many artist like to to paint the scene with Don Quixote fighting real windmills, however I thought it would be an interesting approach to paint what he seeing so vividly in his mind. Four attempts and two years later, here is the result.

Unfortunately I don't have access to a scanner, so this was the best available option.
The camera just doesn't do the piece any justice.
A caption within the piece if you will. An excerpt taken out of the book.

What I imagine Don Quixote's face to be like.


Don Quixote's Giants. Clues about what they actually are can be seen on their legs,
the ring leader's axes and on various articles of clothing.


12.1.12

Pieces inspired by trees

Connectivity

A piece created for myself rather than an assignment. The main theme revolves around our human bodies and how on a cellular level it's functionality and appearance is similar to that of trees. The idea came about when I was just coming home from the gym one day, my mind focused on muscles and nerves working away to allow us to move, when my eyes landed on the branches of a couple of trees.


Created with acrylic paint and oil pastels.


An interpretation of a last name

One of many assignments in drawing class. The primary purpose of this assignment was to give an interpretation of your specific last name without actually spelling it out. Students were expected to place a lot of thought in which mediums they were going to use and were encouraged to go with their second or third idea rather than their initial idea.

The piece was created on watercolor paper and made with ink,
bits of printed on paper and conte.

29.12.11

Favorite Art Pieces

With drawing class completed, I now have twenty pieces nearly completed and nineteen of them which I kind of like. Overall I found the course to be very inspirational and educational in the non-traditional sense. Brian Flynn is one of the best art teachers, not because of his ability to teach but rather his ability to challenge students to push their comfort zones and explore new and breaking grounds. Listed below are two of my most challenging but favored pieces from the course.

Mosaic life figure

This piece was designed around having the artist focusing on the process rather than the end result. Not only was this piece time consuming but required lots of concentration and skill in order to get the proportions of the still life correct. It paid to do contour sketches prior to starting the piece.


Dimension: 32in by 41in.
Medium: Acrylic painted paper


Moroccan Midnight

A piece designed around using the perspective points of Giorgio de Chirico's Melancholy and Mystery of a Street. Due to my lack of interest in the original I had a hard time actually starting. Near the deadline I decided just to go with what I found inspiring, Moroccan architecture, specifically the Hassan II Mosque and somehow incorporate Melancholy and Mystery of a Street. The result is below.

Dimension: 32in by 41in
Medium: Watercolor, Acrylic, and conte


Conclusion: Had a rad time painting and playing with all sorts of mediums.

12.12.11

Christmas Ornaments

This week's posting is dedicated to home made ornaments.
Personally, I think they add that homely touch that can truly make your Christmas tree the unique one.
Here are some home made ornaments made by myself and friends over the years.

Angel timbit ornament made from play dough, ribbon and various other things.
The present was made separately before being hot glued to the rest of the ornament.
Hohoho Santa is coming to town.

The original timbit ornament made by a neighbor who gave my family a few,
one Christmas after we talked about how much we liked them.


A nutcracker ornament made out of clothes pins.
The ornament was made by my boyfriend's mother.

29.11.11

Trapped

Following a discussion in drawing class relating to art pieces like Andy Warhol's "Triple Elvis", and the "Mona Lisa," my instructor gave an assignment where students were to use multiple images for a piece. Due to a class critique that occurred on that very same day, I had two things on my mind. V for Vendetta (one classmate quoted that movie),  and the treatment of string in drawing, both which shaped my idea for the assignment.

Sticking with the V for Vendetta theme I immediately began searching for propaganda posters that populated the media during WWI and WWII, especially those involved with Russia. My research brought me to  constructivism, a movement that influenced art in Russia in 1919. Among many of the posters that were influenced by constructivism I stumbled upon the Tatlin's Tower, while reading more on Guy Fawkes and the rhyme that he inspired, "Remember, Remember the fifth of November." Both eventually lead to the development of my assignment below.


Trapped- Hear no evil, see no evil, and speak no evil. My piece was mainly an expression about how I feel with any large body of people who are expected to remain silent in order to protect the well being of the leader.  A bit heavy handed but what can I say, art imitates life in this case. The entire piece was built out of paper, straws, wire, with foam core as the base. The straws were arranged to bare resemblance to the Tatlin's Tower.

The blocks were made from the scans of several Guy Fawkes ink paintings that I did and the rhyme. Upon printing and arranging the faces to create a box, I sewed the eyes, mouth and ears with red or black string.

One ruler to rule them all the queen reigns tight control over the piece.

30.10.11

Halloween Special Costume Galore!

Below are some of the costumes of the people I hung out with this Halloween. I also mention some of the various levels of involvement when it came to the costume.

" This is my body, This is my blood, Happy are they who come to my supper."
A hundred percent involvement with this costume. I mean the guy soldering iron to forge nails to a wires for his head piece!
"Hello little people. What an absolutely splendid day."
One can never go wrong with Miss Piggy, one prom dress, a blonde wig, pig nose and ears and your done.

"Autobots, transform and roll out!"
However when short on time, there are fantastic costumes one can buy online or at your local costume shop.

Halloween Special Part 2

Today's special is the completed version of my project. Finally after two months of hard work and various trips to Micheals, and the local costume shop I had a costume that I was proud to parade at a Halloween Bash this weekend. For those of you curious I made most if not all the costume, from the spider infested flower bouquet to the wig and veil. The wig was the most cumbersome but the wedding dress had it's fair share of woes and victories.


I originally purchased the hand made wedding dress at value village for a total of $20 (not surprisingly this was the cheapest used wedding dress available.) After soaking dress for a good hour in blue die, I began to splatter the bottom with diluted black ink before taking an exacto knife to the hem of dress to give it that "torn I've been dead and buried for a century look." After that it was a matter of sewing on straps. Overall wrecking the wedding dress was the best part of the project.


Every bride needs a pair of good shoes and a lovely flower bouquet
Took this by accident and found it to be creepy so naturally I' thought to share it.
.  
The fruits of my labor. The entire thing took two hours to put together, (most of it was painting make up on my face, back and arms). It took about the same amount of time to get off. I'm never underestimating cream foundation ever again.
Besties hanging out

28.10.11

Halloween Special- Cupcakes

Hosting a Halloween Party this year? Why not try a hand at spookifying your baked goods and food selections.

The photos below are of some red velvet dirt n'worm cupcakes that I make for a few of my co-workers. For the full recipe check out the following link on the food network website.
WARNING: These cupcakes have a bit of a kick to them.

Baking supplies including Martha Stewart's Halloween cupcake holder.

Close up of the "Watch Out" cupcake holder

After a few failed attempts at shaping the icing into brains I went with gummie worms and dirt (oreo crumbs).


Due to my icing having clumps I was unsuccessful at shaping the icing into brains, so I fell back to making worms and dirt (oreo crumbs) as the toping. However if you would like to give a go at making brain cupcakes you can check out this recipe or this video.

For more Halloween gourmet ideas visit the foodnetwork.

Cheers!

18.10.11

Halloween Special Part 1

Halloween, one of the oldest holidays second to Christmas that dates back two thousand years to a Celtic festival known as Samhains. The Celts that occupied what is now Northern France and the United Kingdom held the belief that the evening prior to their new year (November 1) the boundary between the land of the dead and the living would blur. The spirits of the dead would return to the world of the living causing mischief and mayhem to crops and the like. However it was believed that the presence of these spirits would grant Celtic priest's visions of the future. To celebrate these predictions the people would come together for a bonfire where they would sacrifice animals and burn crops, while wearing animal heads and skins.

While the vast majority of us are less likely to go parading around in animal heads, the opportunity of dressing up as something or somebody else with a bunch of other people is just too good to pass up. And if you're someone like me, the process of creating the costume is just as fun as dressing up.

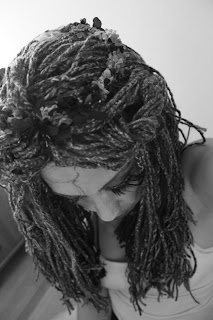
This year I decided to go as the corpses bride. A decision that was solely based on saving money since I already had the wedding dress from a previous costume. In summary I never did save as much money as I had hoped. If anything what I saved in the costume I ended up spending in make up and accessories. No regrets though since the result looks amazing!  See below.
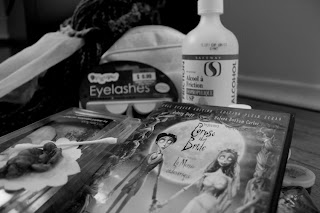
The pile of make up and supplies including rubbing alcohol, rotting flesh prosthetics, various blue, grey, black eye shadows and black eyeliner, white cream and a pair wicked eyelashes.
A wig that I constructed by hand. It took and obscene amount of time, effort and yarn to make this nightmare of a wig. Looking back I should have forked over the $25 for the corpses' bride wig than go through the misery of wasting so much time on braiding this stupid thing.

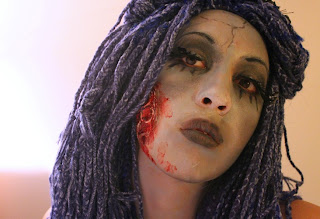
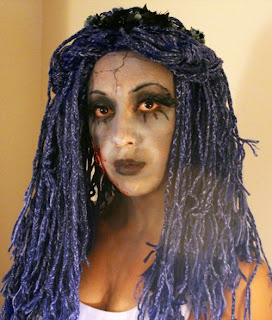
Was strongly debating whether or not the fact eye lashes coupled with the flesh wound was too much. In the end I thought, go big or go home.

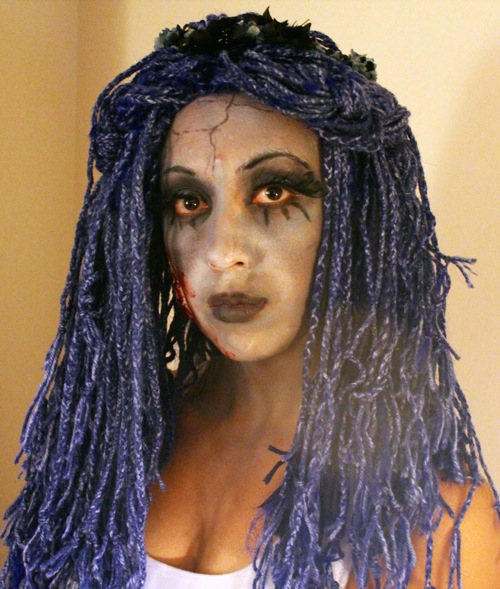
The completed picture after an hour of applying make up. There are a few kinks I need to work out but I'm satisfied with how it turned out.
My version of the corpses bride has a bit more gore than Tim Burtons'. If you're more interested in the elegant version there is a good video on youtube made by audfaced. However if it's all blood and guts that appeases your appetite be sure to check out the following link, which provides a list of supplies and videos needed for applying zombie make up.

That's it for now.

P.S- Full costume will be featured on Halloween.

5.10.11

And More Jewelery

Hi Everyone,

It's been very hectic this past few months. Between my enrollment in school and my full time job, I haven't been able to dabble in any of my hobbies and home projects.
Yes, that is my excuse for the delayed update on my blog.
Fortunately I come bringing updates and "completed" projects to show.

Note- When I say completed, I mean I've gotten tired of working on said project.

For this week I'll be presenting a few jewelery piece that I will be selling come spring, or whenever I have some free time.

As for the rest of the month, I will be sharing pieces all related to one of the best holidays of the year, Halloween! So stay tuned!


 African Sunset Multi-chain Necklace

A piece that I created using a few orange beads that I had kicking around.

 Golden Sun Necklace

A piece made from yellow glass beads and basic clay beads.

 Sea Coral Crochet Necklace

A crocheted necklace that made use of all my mismatch of blue and green glass beads.
 

13.7.11

Nature Inspired Jewelery

Surprise double week posting!
Seeing as I'll be running away to San Francisco for the next two weeks it's likely that I won't even bother posting anything till the beginning of August so hence the additional posting for this week.
Celebrating the fact it's summer I decided to give crack at some summer themed jewelery. Here are the results.


Wind in the Willows Necklace
The main inspiration behind this piece is the children book, "Wind in the Willows." by Kenneth Grahame. The piece is handmade with glass leaf beads and green pearls.

A close up.


Dobet Gnahore Inspiration
An African inspired piece named after one of my favorite artists Dobet Gnahore. You can check out one of her tunes Samahani

The necklace was constructed with leaf shaped pearls, small red wooden beads and polymer clay beads that I created to imitate stone.


A Winter's Garden
Not summer themed but pretty regardless. I made this a few months back.

Close up


12.7.11

A Present For a Friend Part 2

Unlike the continuation of most films, this continuation is equal if not better to last week's post. The images below are the second part of my friend's gift. The dress was sewn and fitted by Shelley, another friend of mine. Due to hectic scheduling it took a while for all three of us to get to together to discuss things like fabric, measurements and finally fitting.  However once the ball got rolling it didn't take long before the dress was completed and I had the graphic image printed onto it. Despite being a few months late with her birthday present, I'm sure Eve thought it was worth the wait. 

A type portrait I made in Photoshop. And yes that is my friend's Eve face and name. To learn how to do something like this feel free to check out the following link: A picture is work a thousand words.

The overall dress which I thought turned out pretty well.

Here's the close up.